Svelte + Netlify Hello World
This post walks through setting up a basic serverless Svelte App using netlify to host your code and netlify lambda functions to handle API requests and protect your API keys.
If you’re already familiar with the basic web-stack (HTML/CSS/JS) and you want a simple component-based framework, Svelte is hard to beat. Pairing Svelte with the free hosting provided by netlify makes for a pretty awesome framework to get your project up and running in the real world quickly.
While there’s great documentation for both svelte and netlify, I hadn’t seen a walkthrough for using them together. I’ve already used both platforms before, but since I was spinning up a brand new project and I’ve been away from my other svelte netlify project for a few months, I thought I would try to bring a beginner’s mind to the process and write the steps as I go. Hopefully this will help anyone (including future me) just getting started with a svelte/netlify project.
Note: this post will not help you with learning to write svelte apps. My “beginner’s mind” here applies only to setting up Netlify with Svelte. For Svelte itself, there is already fabulous documentation that you should let guide you.
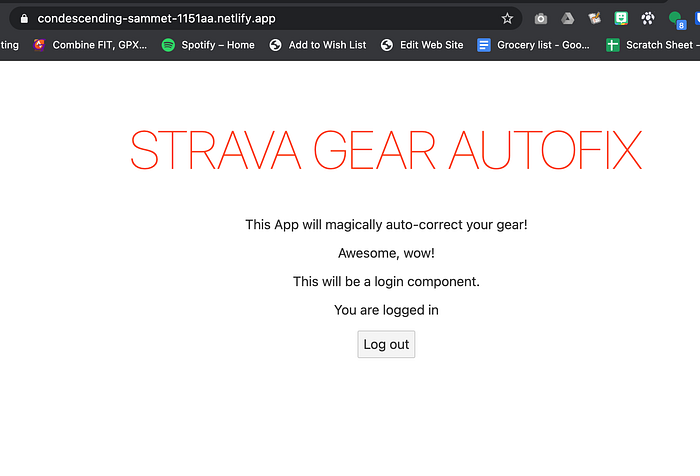
The final project is hosted here: https://strava.tomhinkle.net
Code is here: https://github.com/thinkle/strava-gear-fix/
Setting Up Github Repo
Your first step for any netlify project is to create a new github repository. I created the project in github itself, then started a new project in VS Code, and then pointed the VSCode project to the github repo. So I now have VSCode and Netlify both looking at the same empty github repo.
Next up, following the simple instructions on the Svelte blog, I got my starter svelte code pulled into my project by running the following commands at the terminal:
npx degit sveltejs/template my-project-name
npm update
npm run dev
Bam, I have a hello world running locally in my browser. If I pull VSCode side-by-side with the browser window, I’ve basically reproduced the repl experience on my local machine.

Next, I open up App.svelte, change the text, save the file, and it’s already auto-reloading in the browser: pretty sweet!

Roughing Out the App Structure
Next step, I’ll rough out the structure of my app. I want to make a simple app that will use Strava APIs to automatically fix which bike is assigned to each strava activity I do. Strava only allows you to set one default bike, but I’d like to use the old bike I have on my trainer for all virtual rides and my mountain bike for any ride that averages under 10mph.
As far as structure goes, I know I’ll need something like the following for the user:
- Landing page (App.svelte)
- Login page: Get the user logged into strava / get API permissions to access their data. (Login.svelte)
- Configuration: Create an interface to grab the user’s bike list and let them set up rules to map different rides to different bikes based on parameters such as average speed. (Config.svelte)
To start, I went ahead and created two components for the first two steps: App.svelte and a page called Login.svelte and I committed to source control.
My .gitignore is set up to keep me from having to worry about build files, node modules, etc.
Before I go any further, I’ll just commit these to my github repo. Next step before I do anything real is getting that repo up on netlify.
Deploying to Netlify
In netlify, I created a new site pointing at my github repo. The only setting I had to change was the publish directory, which is public in svelte, so I had to change dist (the netlify default) to public.

I just click “Deploy site” and netlify correctly pulls in everything I need based on my package.json and rollup.config.js which were set up for me in the svelte template.
Setting up API Access via Netlify Functions
To keep my API keys secure, I’ll need to set up the next layer of the project now. Using netlify as my platform, I’ll plan to use lambda functions to make all of my API requests.
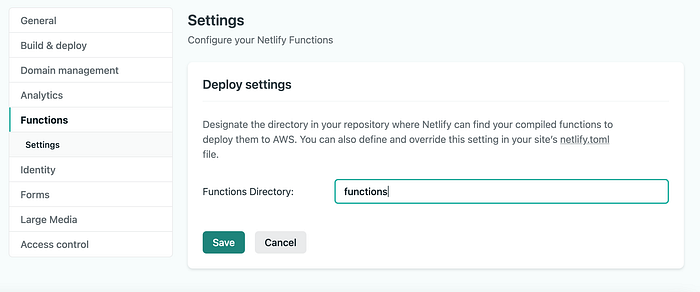
Step 1 is to go to the Functions settings in netlify and designate a functions directory.
Next up, I’ll set up my source directory. I like to build my functions, so I’ll set up a src/functions which compiles to a /functions/ directory at the root level. Building functions requires an extra build step which means editing rollup.config
It turns out if you export an array from rollup instead of an object, you can have multiple builds, so I just go into my rollup.config.js and add a secondary build for the functions, like so… note the format is common JS.
Next up, I’ll go ahead and write a “hello world” function to test it out. My hello world will just echo any parameters given or json body posted to the endpoint.
I commit to github to trigger a netlify build, then I can access my function at my URL plus .netlify/functions/name-o-file like so: /.netlify/functions/api?foo=bar

Testing Netlify Functions
Once I’ve introduced netlify functions into the equation, I have a bit of a problem when it comes to testing since my local npm run dev command only spins up the svelte part of my app and not the netlify lambda function endpoints. If I don’t want to commit every time I want to see a function update, I’ll need a way to test it locally, which I can do by setting up Netlify’s CLI tool.
First, go ahead and run netlify init to connect your dev directory to the netlify deploy instance you’re running, that way when you later set up things like API keys as environmental variables in netlify, you’ll have those same keys available in your local dev setup without any extra work.
Next, I’ll edit or add a netlify.toml configuration file in my root directory that tells netlify’s devtools that I have lambda functions to serve.
I create a file called netlify.toml with the following section:
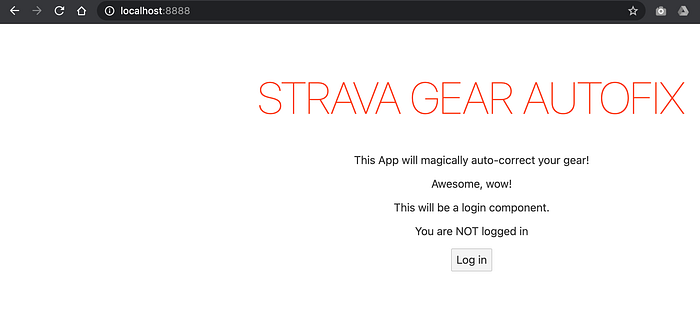
Now I can run netlify dev and the browser will serve up both my site and my functions at port 8888:

Saying Hello to My Functions From Svelte
I as might as well just show my front-end can talk to my netlify functions backend to complete this section of the set-up before I use an actual API from the backend.
I went ahead and made a simple fake “Config” component which will just allow me to send a custom message to my netlify function and display the response. Later I’ll replace all this with real stuff.
The netlify endpoint is going to be my base URI + ‘.netlify/functions/api’
This file gives me a little field I can type new data in — clicking “Send Request” makes a round trip to my netlify function “backend” and echoes the parameter back to myself.
Once you’ve confirmed that’s working, you know you have a working build process for both the back and front ends of your netlify app that you can run locally and push to source control to deploy to netlify.
My First Real API Call
Now that I have my development environment working nicely, I’m going to go ahead and look at the API I need to use and make my first real API call. This will of course look different depending on your project and what APIs you need to access, but it will likely involve similar steps in terms of storing API keys in netlify environmental variables, accessing those variables in your functions file, and so on.
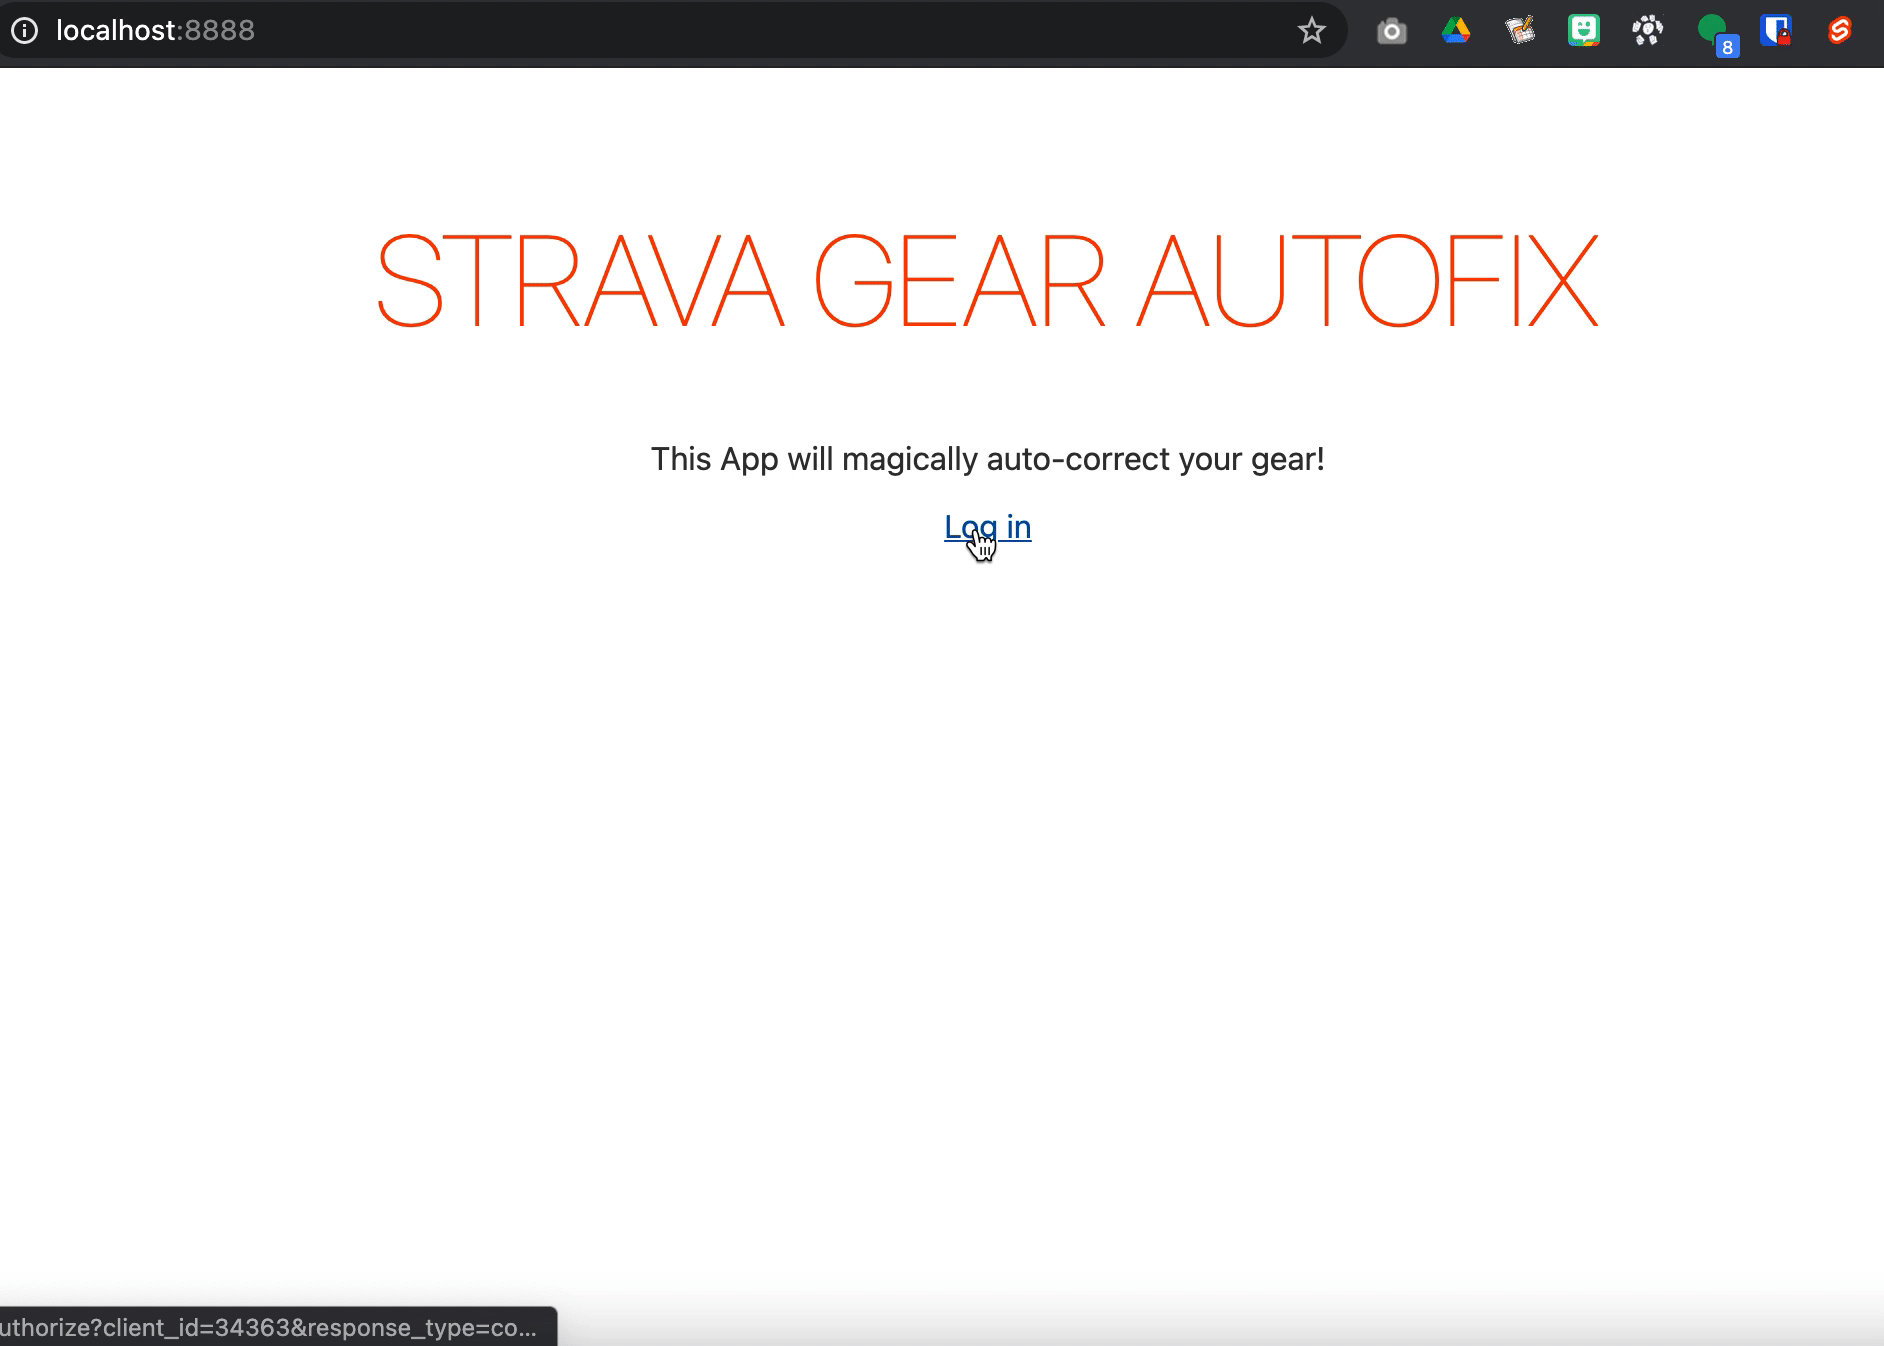
To authenticate my user, Strava has me provide my user with a magic URL which includes my APP ID and a redirect URL. Once the user has authenticated, I will get a code in the URL the user has been redirected to that I can exchange for a token which in turn I can use to authenticate future API requests. To get the token, I need to provide my API key, so that step has to happen in my lambda function and not in my user-exposed code.
Securing API Keys
My app will need API keys to authenticate requests, but those need to be kept out of source control and out of user-facing JS. The solution: I will store them in netlify environmental variables accessible by my lambda functions running on the netlify server. Using netlify dev will make these variables available on my local build as well, which is pretty handy for testing!
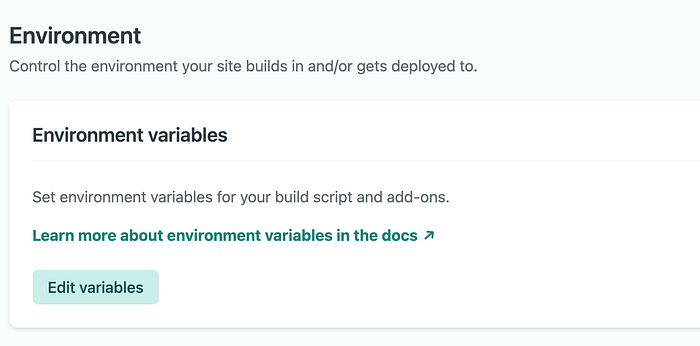
In Netlify, I’ll go to site settings => environmental variables, and then create variables to store my API keys from strava.
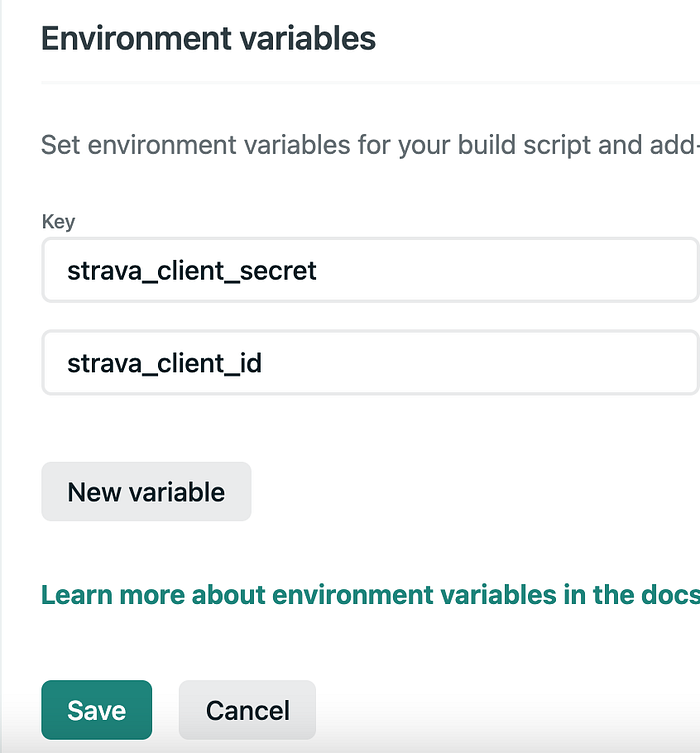
To access those environmental variables in my lambda function, I can just point to process.env.variable name, like
const STRAVA_CLIENT_SECRET = process.env.strava_client_secret;
const STRAVA_CLIENT_ID = process.env.strava_client_id;
Now, I just add an API endpoint into my api.js function. My first step is to exchange a code for a token, which I do like so:
Meanwhile, in my front-end code, I get the code by creating a link which only needs my client id (doesn’t have to be secret) and then I can read the code out of the URL.
Supposing I don’t want to commit the client id to github, I can also store that in a netlify environmental variable, which I can then roll into my svelte code using a rollup plugin called rollup-plugin-replace which will just do a find/replace on my source code at build time. I also use this to access the URL of my Netlify site, which is automatically stored in process.env.URL on netlify.
For the login process to work, I’m going to have to do the following steps:
- Create a link from my svelte app to strava which contains my client ID, the API scopes I want access to, and a redirect URI (back to my app) which strava will use to give me a “code” I can exchange from the token.
- Send the code from my frontend to my lambda function backend.
- In the backend, exchange the code + my API key for a token I can use to access strava APIs from my front end. Return the token to my front-end.
- Store the token in localStorage so my svelte app can hit the Strava APIs.
- Check to see if the token has expired and if it has, pass it to my backend so I can refresh the token automatically using my API key.
- Allow the user to log out by deleting the token from local storage.
Note: because there is a separate token used in this API, I don’t have to pass every API call through the backend, just the authentication process. With other apps, you might need to do more echoing of API calls through your backend to protect secrets and so forth.
Here is what the front end code looks like:
On the backend, I’ll need to implement both a login and a refresh call, which simply pass along a code and my API key to the strava API in secret and then return a login token to my front-end code.
Using My API
Ok, at this point I’ve shown everything I really need to, but it feels incomplete if I don’t at least hit the API once in this quick set-up.
My last step will be to hit one of the API endpoints from my front-end app using the access token I have gotten.
A quick note: I glossed over storing the access token in my previous code. The token comes from my stores.js file, which just looks like this:
My Login component will populate and refresh that token automatically, so now I can go ahead and have my App actually use the token.
Here’s a simple component that just fetches my athlete data from Strava and displays the list of bikes the user has as well as their first name.
And here’s a quick screencast of it working:
From here on out, everything is pretty straightforward development, just working with the Strava API and the svelte framework to build a user interface for it! That, of course, is the fun part.
The final project is hosted here: https://strava.tomhinkle.net
Code is here: https://github.com/thinkle/strava-gear-fix/
